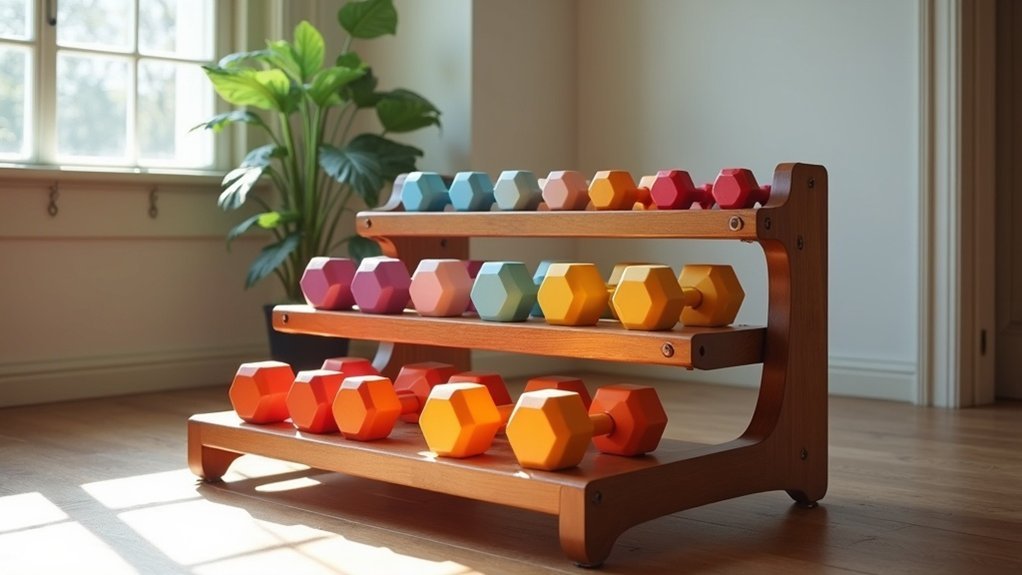
To build a compact dumbbell rack for your home gym, start by gathering plywood, screws, and essential tools like a drill and saw. Cut the plywood into the following dimensions: three strips at 15 ¾” x 96”, then halve one of these strips to create two 48” pieces. Drill six pocket holes in the bottom shelf for added stability, and securely attach the shelves using pocket screws. Ensure precision in your cuts and regularly inspect the rack for wear to maintain safety and functionality. If you’re looking to customize your rack or need maintenance tips, there’s plenty more to explore to enhance your home workout experience!
Key Takeaways
- Cut plywood into specific dimensions, including a top shelf of 50 ¾” and a bottom shelf of 47 ¾”, to create a compact and efficient design suitable for your home gym.
- Use pocket screws to securely attach the shelves, ensuring enhanced stability and strength in the rack’s structure, which is essential for safely storing your dumbbells.
- Incorporate sturdy materials with a thickness of at least ¾” to guarantee durability and support, making it a reliable addition to your workout space.
- Customize the rack’s finish and labeling to reflect your personal style while enhancing the functionality of your home gym setup.
- Regularly check and maintain the rack’s stability by tightening screws and inspecting for any wear or damage, ensuring your workout area remains safe and organized.
Materials Needed for Your Dumbbell Rack
Building a dumbbell rack is an excellent project for creating a functional and organized home gym, benefiting both men and women who prioritize their health and fitness.
To construct your DIY dumbbell rack, start with a sheet of plywood for the main structure, ensuring efficient use of materials to minimize waste. You’ll also need essential hardware such as screws, nails, and metal brackets to provide stability and support for the weight of your dumbbells.
Don’t forget to gather important tools including a power drill, circular saw, measuring tape, and clamps to streamline the assembly process.
For a budget-friendly option, consider repurposing scrap wood you may have on hand.
Lastly, to give your dumbbell rack a polished appearance, adding finishes like paint or stain can enhance the aesthetic of your home gym, making it a motivating space for your workouts.
Step-by-Step Construction Process
To create your own dumbbell rack and enhance your home gym setup, follow these straightforward steps that guarantee a sturdy and functional end product.
Start by cutting plywood into three strips measuring 15 ¾” x 96”. Cut one strip in half to obtain two pieces of 48”. Apply glue and clamp the panels together with the good sides facing out.
Cut plywood into three strips, then halve one for a sturdy base, applying glue and clamping for stability.
Next, cut a top shelf to 50 ¾”, a bottom shelf to 47 ¾”, and two side pieces at 22 ¼”. Drill six pocket holes on each side of the bottom shelf to enhance stability.
Finally, assemble the rack by securely attaching the shelves using pocket screws, ensuring it can hold a range of dumbbells from 5-50 lbs, perfect for your home workouts.
Tips for Ensuring Stability and Safety
When building your dumbbell rack for your home gym, ensuring stability and safety is crucial for effective use. Start by making precise and aligned cuts; even minor discrepancies can affect the rack’s stability.
Opt for sturdy materials such as plywood or hardwood, with a thickness of at least ¾”, to adequately support the weight of your dumbbells. Securely attach each shelf using pocket holes and screws, ensuring that all connections are tight and free from wobble.
If you’re constructing a wall-mounted rack, always anchor it to wall studs using heavy-duty brackets to prevent tipping during workouts.
Regularly inspect your rack for any signs of wear or loose screws, and make sure to tighten or reinforce any weak points to maintain safety while exercising at home.
Customization Options for Personal Style
Customizing your dumbbell rack not only boosts its functionality but also allows you to express your unique style in your home gym.
Personalize the color and finish of your dumbbell rack with paint or stain that complements your workout space, whether it’s a sleek modern look or a more rustic vibe.
Enhance organization by incorporating labels for weight identification, using stickers or stencils that make it easy to find what you need quickly.
Design your rack with modular components to accommodate your growing weight collection and adapt to changes in your space.
Consider adding decorative elements, such as carved designs or unique shapes like angled or tiered designs, to create visual interest while ensuring practicality.
These customization options ensure your rack not only reflects your personality but also fits seamlessly into your fitness environment, making your home workouts more enjoyable and effective.
Maintenance and Care for Your Rack
Maintaining your dumbbell rack is just as important as selecting the right equipment for your home gym. Regularly check its stability by tightening screws and inspecting for any wear or damage. This ensures safe dumbbell storage and helps prevent accidents during your workouts.
Clean the rack’s surfaces frequently to avoid dust buildup, which can affect both the aesthetics of your gym space and its usability. Periodically inspect brackets and supports; replace any loose or damaged components to maintain structural integrity.
If your rack is made from wood, consider refinishing surfaces that show scratches or dents to preserve its longevity. As your weight collection grows, adjust the organization by placing heavier weights on lower shelves for optimal stability and easy access, making your home workouts more efficient and enjoyable.


