To effectively use gym mats for leveling your home gym equipment, start by evaluating the evenness of your floor with a level to identify any high or low areas. Select high-density rubber mats that are at least ¾ inch thick for optimal durability. Position the mats closely together to create a smooth and uniform surface, securing them with anchors to prevent shifting during your workouts. Once set up, test the stability of your equipment by gradually adding weight and making adjustments with shims as necessary. Regularly check and maintain your leveling system to ensure a safe and stable workout environment. Discover more effective strategies to enhance your home gym setup and stay fit at home!
Key Takeaways
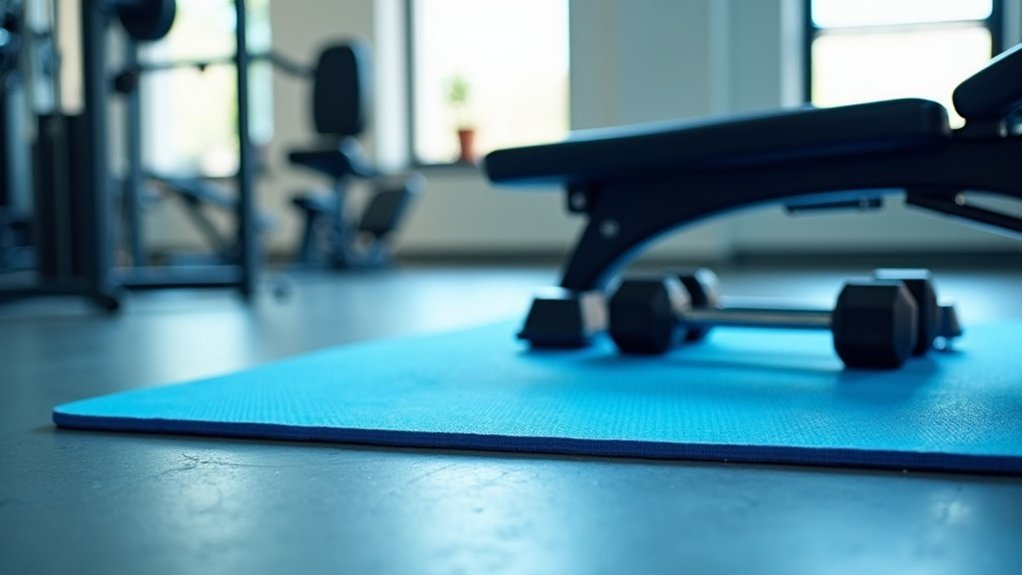
- For optimal support and shock absorption beneath your home gym equipment, use high-density rubber mats that are at least ¾ inch thick.
- Measure and document any uneven areas on your home gym floor to identify where additional matting or shimming may be necessary for stability.
- Arrange the mats closely together and secure them with concrete anchors to create a uniform surface, reducing the risk of tripping hazards during your workouts.
- Implement shimming techniques to effectively adjust the height of the mats, ensuring your equipment is level even on uneven surfaces.
- Regularly inspect the mats and shimming placements to maintain stability and safety while exercising at home.
Identifying Uneven Surfaces
To ensure your home gym mats provide optimal support and safety, it’s essential to identify any uneven surfaces beneath them.
Begin by using a level to accurately measure the floor, allowing you to pinpoint any high and low spots. Perform a visual inspection for noticeable slopes or dips, particularly in areas where your equipment will be placed.
Use a level to measure your floor accurately, identifying high and low spots for optimal equipment placement.
Use a measuring tape to document height differences at various points across the floor. If your equipment is already set up, check for stability and listen for any rocking, which can indicate uneven surfaces.
Regularly monitoring the floor’s level will help you catch any changes that could affect the stability of your gym equipment and mats, ensuring a safe and effective workout environment for both men and women at home.
Choosing the Right Mats
When selecting gym mats for your home workout space, prioritize durability and the right thickness to meet your fitness goals.
Opt for high-density rubber mats that are at least ¾ inch thick to ensure stability and effective shock absorption during your exercises.
It’s essential to choose mats that match the size and thickness of your existing ones to eliminate any tripping hazards, allowing you to focus on your fitness journey safely and effectively.
Material Durability Considerations
When selecting the best gym mats for your home workout space, it’s essential to prioritize material durability, especially if you’ll be using them with heavier equipment.
High-density rubber mats are particularly effective in providing both durability and shock absorption, making them a perfect choice for creating a functional home gym.
Here are some key features to consider:
- Ultra-dense stall mats (¾ inch thick) ensure long-lasting performance for all your fitness activities.
- Non-slip surfaces enhance safety, giving you peace of mind during your workouts.
- Moisture-resistant materials help prevent degradation, ensuring your gym mats maintain their integrity over time.
- Excellent resilience against compression ensures your mats keep their shape, providing a stable foundation for your exercises.
Investing in high-quality gym mats won’t only protect your flooring but also enhance your overall workout experience at home.
Thickness and Density Factors
How do you determine the right thickness and density for your home gym mats? Opt for thicker options, like ¾ inch stall mats, as they provide excellent cushioning and stability for your workout equipment.
The density of rubber flooring is crucial for durability; choose super dense mats if you’re engaging in high-impact activities. Thicker mats also absorb shocks from dropped weights, offering superior protection compared to thinner alternatives.
Maintaining consistent thickness is essential for a uniform surface, which helps reduce the risk of equipment instability during your exercises. Ensure your chosen mats can support the weight of your equipment to prevent compression and maintain effective leveling over time, allowing you to focus on your fitness goals.
Arranging Mats for Stability
When arranging mats for stability in your home gym, it’s essential to focus on effective placement strategies that create a uniform surface, minimizing tripping hazards for all users.
Secure the mats properly using concrete anchors to prevent any shifting during workouts, especially when using heavy equipment.
Additionally, be sure to address uneven surfaces by employing shimming techniques, which will ensure a solid foundation for all movements, making your home workouts safer and more effective for both men and women.
Mat Placement Strategies
To maximize stability and safety in your home gym setup, start by evaluating the floor for any slopes or uneven areas. Proper mat placement is essential for leveling your equipment and ensuring a safe workout environment.
- Align mats closely to create a uniform surface for all your exercises.
- Weigh down mats with heavier home gym equipment to enhance stability during workouts.
- Use shims or additional mat layers to compensate for any high or low spots on the floor.
- Regularly inspect the mats for wear or shifting to maintain a safe exercise space.
Creating a secure and level workout area will help you focus on your fitness goals while minimizing the risk of injury.
Securing Mats Effectively
Securing your home gym mats effectively is essential for maintaining stability during your workouts, whether you’re lifting weights or doing high-intensity interval training. Ensure that you place anchors only on the outer edges of your workout space to avoid mats touching walls or heavy equipment. Utilizing ¼ Tapcon concrete anchors with metal sleeves will help prevent any unwanted movement. Drilling holes through the mats beforehand allows for precise positioning, ensuring a flush fit for the anchors. This practice reduces shifting and minimizes potential tripping hazards, enhancing the overall safety and stability of your home gym.
| Anchor Type | Placement Guide | Benefits |
|---|---|---|
| ¼ Tapcon Concrete | Outer edges only | Prevents mat movement |
| Metal Sleeves | Flush fit on concrete | Enhances stability |
| Drilled Holes | Mark before installation | Guarantees precise alignment |
Adjusting for Uneven Surfaces
Adjusting your gym mats for uneven surfaces is crucial for ensuring stability and safety during your home workouts.
Begin by using heavy-duty stall mats to create a solid foundation for your equipment. Assess the floor’s slope and fill any low spots with additional shims or mats to keep everything balanced:
- Align mats closely to prevent gaps that could affect your workout
- Position mats under the legs of your equipment for enhanced stability
- Ensure mats are flush with the surrounding surface for a seamless workout experience
- Regularly check and adjust mats to account for any shifts that may occur
Securing Mats to Prevent Movement
When it comes to creating a safe home workout environment, properly securing your gym mats is crucial to prevent unwanted movement.
Utilizing ¼ Tapcon concrete anchors is an effective method; simply drill holes through the mats and into the concrete to anchor them securely. This technique minimizes the need for constant repositioning during your exercises, allowing you to focus on your fitness goals.
Make sure to anchor only the outer edges where the mats don’t touch walls or equipment for the best results. Additionally, consider using steel sleeves with Tapcon anchors to avoid mat damage.
For enhanced stability, framing the mats with 1-inch runner boards or applying commercial urethane adhesive can provide extra security against movement, ensuring you can work out confidently and safely at home.
Testing Equipment Stability
To ensure your home gym equipment stays stable during workouts, start by checking its levelness across different sections.
Ensure stability in your home gym by checking the levelness of your equipment across all sections before workouts.
Make sure the floor underneath is clean to prevent any inaccuracies. Gradually add weight to the equipment while observing for any wobbling or shifting.
Based on your observations, utilize steel or UHMW plastic shims to adjust the height for optimal stability. Regular inspections are crucial, particularly after making any adjustments.
- Use a level on each section of the equipment
- Gradually increase the weight
- Look for any tilting or wobbling
- Apply shims for necessary height adjustments
This process is essential for confirming your equipment’s safety and performance, allowing you to focus on achieving your fitness goals at home.
Maintenance and Adjustments
Maintaining your home gym equipment is crucial for both safety and performance, particularly on uneven surfaces. Regularly inspect mats, shims, and leveling devices for signs of wear, and make necessary adjustments to ensure stability during your workouts.
Keep your workout area clean, as debris can lead to slips around shimming materials. Periodically check the floor level, as shifts in your home’s foundation may create new unevenness that requires further adjustments.
Ensure weights are evenly distributed on racks to minimize tipping risks, especially on sloped floors. Use appropriate fillers or shims to close gaps between equipment and the floor, which enhances safety and workout effectiveness.
Stay proactive in your maintenance routine to achieve peak functionality in your home gym.


