To film your lifts for form checks at home, set up a tripod in a well-lit area of your workout space to capture the best footage. Film your last working set from a side or front quarter angle; this perspective helps you evaluate your technique and bar path effectively. Keep the video focused on the lift by trimming unnecessary parts to maintain clarity. Ensure your home gym environment is distraction-free and be mindful of your surroundings to avoid interruptions. As you continue to improve your skills, there’s always more to learn about analyzing your performance to maximize your home workout results.
Key Takeaways
- Use a tripod to stabilize your camera for clear and steady footage of your lifts at home.
- Capture videos from a side view to accurately assess your form and technique while using your home gym equipment.
- Ensure good lighting, preferably natural light, in your workout space for better visibility of your movements.
- Film your last working set to analyze your performance during peak effort and maximize your home workout.
- Share your videos with coaches or peers for constructive feedback on your lifting form, helping you stay healthy and improve your home exercise routine.
Benefits of Taking Video of Your Lifts
Filming your lifts at home can be a game changer for your fitness journey, as it provides immediate feedback on your technique that you mightn’t notice in the moment.
With video analysis, you can perform a thorough form check, pinpointing issues with your entire body while lifting your working weight using your home gym equipment.
This visual documentation allows you to track your progress over time and see improvements that may not feel apparent.
Different angles can reveal insights into your technique, enhancing your self-coaching efforts.
How to Take a Good Lifting Video
In order to capture a great lifting video in your home gym, it’s essential to evaluate your setup before you even start your workout. Use a tripod to stabilize your camera and film from a side view, which allows you to see your form clearly. Ensure you have good lighting—natural light works great if you can position yourself near a window—and position your camera to effectively capture your last working set. Trim unnecessary footage and focus on the lift itself for a clear assessment of your performance. Here’s a quick guide to help you:
| Setup Tips | Purpose |
|---|---|
| Tripod Stabilization | Clearer angles |
| 3/4 Angle | Better form analysis |
| Good Lighting | Accurate feedback |
Now, grab your home gym equipment, set up your camera, and video your lifts for continuous improvement on your fitness journey!
Gym Etiquette When Taking Video
While you’re excited to document your home workouts and track your fitness journey, it’s important to maintain good etiquette to ensure a positive environment for everyone in your household.
Here are some tips to keep in mind while filming your sessions:
- Choose a dedicated space in your home that’s free from distractions to set up your camera.
- Limit your video sessions to key moments, focusing on essential exercises to minimize interruptions.
- Use headphones if you’re playing music or instructions, and ensure you’re not capturing anyone else’s activities without their consent.
Evaluating Performance Through Video
Utilizing video to evaluate your performance at home can greatly enhance your training effectiveness. By recording your lifts with your home gym equipment, you can conduct detailed form checks and identify areas needing improvement.
For instance, reviewing footage from your home squat rack can help you pinpoint depth issues or lock-out positions in deadlifts that might go unnoticed in real-time. Comparing past videos reveals progress in lifting technique and overall performance, beyond just the weight lifted.
Additionally, sharing your clips with coaches or peers online allows for valuable feedback, enabling quicker corrections of bad habits. Regular video analysis keeps you on track with programming adjustments and performance patterns, elevating your long-term fitness success while working out at home.
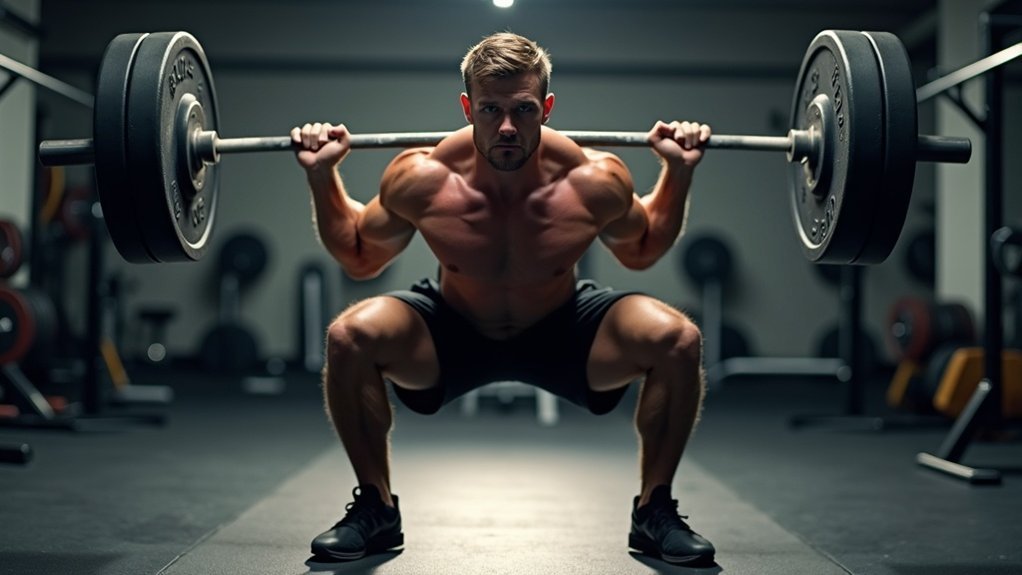
Recommended Camera Angles for Main Lifts
Capturing your lifts from the right angles can make a significant difference in analyzing your technique and performance, especially when working out at home.
Capturing your lifts from optimal angles is key to refining your technique and enhancing performance during home workouts.
Here are some recommended angles for main lifts that can help you maximize your home gym experience:
- Squats: Film from a rear quarter at eye level to check your depth and hip drive, ensuring you’re performing the exercise correctly.
- Deadlifts: Use a front quarter angle for a clear view of your bar path and back position, which is crucial to avoid injury and maintain good form.
- Overhead Presses: Capture from the front quarter to monitor the vertical bar path and lockout, helping you build strength effectively.
For bench presses, film from the side to guarantee proper grip and elbow positioning, allowing you to make necessary adjustments.
Additionally, don’t forget to use a 45-degree angle for heavy lifts to gain further insights into your technique and performance!


