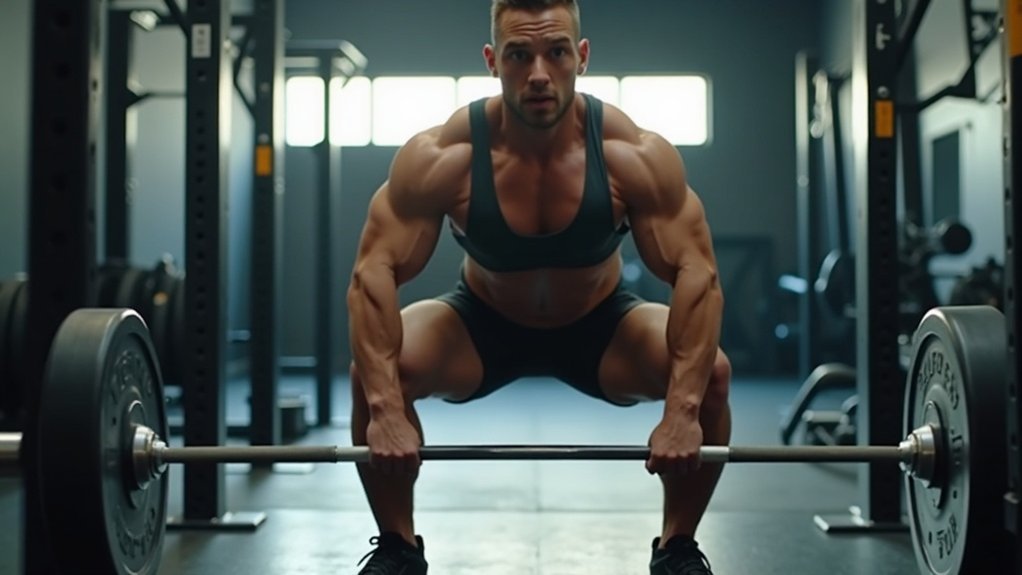
To accurately assess squat depth at home, position your camera approximately 27 inches high, around 105 inches from the lifter, and at a rear oblique angle parallel to the knee. This setup ensures that the hip crease remains visible beneath the knee, which is crucial for evaluating form effectively. Avoid common mistakes such as filming from inappropriate heights or angles, as these can obscure essential details. Experimenting with different camera setups can enhance your assessments, helping you maintain proper technique while working out at home. With practice, you’ll gain further insights into your form and progress.
Key Takeaways
- Position the camera parallel to the knee at approximately 27 inches high for optimal visibility of the hip crease during squats, making it suitable for home gym setups.
- Maintain a distance of about 105 inches from the lifter to prevent distortion and ensure accurate depth assessment, ideal for tracking progress in your home workouts.
- Use a rear oblique angle to simulate a coach’s perspective, providing a clearer view of critical alignment points for effective self-monitoring.
- Conduct trials at knee level to verify camera placement, ensuring the hip crease is visible below the knee for proper form and technique.
- Regularly review and adjust camera angles to maintain consistency and improve self-assessment accuracy across different attempts, helping you stay on track with your fitness goals at home.
Understanding Squat Depth Assessment
When evaluating squat depth at home, it’s crucial to understand the specific criteria that determine whether your lift meets standards.
To ensure proper assessment, position your camera parallel to your knee, which allows you to accurately determine if your hip crease is below the knee. Setting the camera at an elevation of around 27 inches provides the best angle to capture your form.
Avoid using different camera angles, such as front or back views, as these won’t provide the perspective needed for precise evaluation. Consistent positioning that mimics a judge’s view is essential for effective self-assessment and preparation, especially if you’re aiming to stay healthy and fit through home workouts.
Importance of Camera Positioning
Proper camera positioning is vital for effectively assessing squat depth, as it significantly impacts the visibility of critical alignment points. The best angle to capture is parallel to the knee, similar to a referee’s perspective. A consistent height of around 27 inches is recommended for uniformity, while lower angles can enhance visibility for shorter individuals. It’s important to steer clear of social media angles that may lack the detail necessary for a proper depth assessment. Ensure that the hip crease is clearly visible below the knee for accurate evaluation.
| Camera Position | Visibility | Compliance with Standards |
|---|---|---|
| Parallel to Knee | High | Yes |
| Low Angle | Enhanced | Yes |
| Front/Back Angle | Poor | No |
This guidance can help you create an optimal home gym setup, ensuring that your workouts are effective and safe.
Ideal Camera Angles for Squat Checks
Camera positioning is crucial for effectively assessing squat depth at home, and understanding the ideal angles can significantly enhance your evaluation accuracy.
For an accurate assessment, position your camera parallel to the lifter’s knee. This setup allows for a precise evaluation of the hip crease in relation to the knee joint. Aim for a low viewpoint, similar to that of a referee, by setting the camera height to approximately 27 inches.
Place the camera about 105 inches away to maintain a consistent perspective across multiple attempts. It’s important to avoid traditional social media angles, like front or back views, as they don’t provide the depth assessment necessary for proper judgment during home workouts.
Common Mistakes in Camera Setup
While many home gym enthusiasts may believe they’ve set up their camera correctly for squat assessments, several common mistakes can hinder effective evaluations of squat depth.
Positioning the camera too high can obscure the hip crease in relation to the knee, making it difficult to assess depth accurately. Filming from typical front or back angles, often seen on social media, lacks the necessary perspective for precise checks.
Additionally, failing to align the camera parallel to the knee can misrepresent whether the hips drop below the knee. Ignoring the lifter’s height can also lead to poor visibility.
Lastly, distracting backgrounds can divert attention and impede accurate depth evaluation. By avoiding these pitfalls, you can enhance your at-home workout assessments and ensure proper form during your exercises.
Experimenting With Different Angles
When experimenting with camera angles for home workouts, position the camera parallel to the knee to replicate a referee’s perspective, ensuring accurate depth assessment during exercises.
Setting the camera height around 27 inches aligns with the squatter’s hip crease, providing a clear view of critical metrics for maintaining proper form.
Effective Camera Positioning
To ensure accurate squat depth assessment at home, it’s crucial to experiment with various camera angles and positions.
Position your camera parallel to the knee level, similar to a kneeling referee’s viewpoint, to clearly see the hip crease in relation to the knee. Height is important; ideally, set the camera at 27 inches to cater to different body types.
Avoid standard front or back views, as they often miss important depth feedback. Conduct trials by filming squats at designated box heights from both front and side angles, and analyze the depth perception in each recording.
Regularly review your footage and make adjustments to your camera positioning to determine the most effective angles for a clear depth assessment for every lifter in your home gym.
Angle Impact on Depth
Since different camera angles can significantly influence your perception of squat depth, it’s essential to experiment with various positions during your home workout assessments.
Position the camera parallel to your knees, mimicking the viewpoint of a referee to ensure accurate evaluation. While front views may obscure the position of your hip crease, side views offer clarity for assessing depth.
Standardizing the camera height at 27 inches helps maintain consistency across different angles and body types. Avoid common social media angles, as they provide limited feedback.
Analyzing Video Clips for Feedback
When analyzing video clips for squat depth in a home gym setting, focus on techniques that assess the hip crease in relation to knee height from both side and front angles.
This angle comparison helps you identify specific mechanics and common mistakes, enhancing the accuracy of your feedback.
Document relevant details, such as box heights and any changes in home gym equipment, to ensure a comprehensive understanding of each squat attempt.
This approach will aid in promoting effective workouts for both men and women striving to maintain their health and fitness at home.
Depth Assessment Techniques
Analyzing squat depth through video clips is essential for ensuring effective home workouts and maintaining proper form. To achieve accurate feedback, position your camera parallel to your knee, ensuring that your hip crease is below your knee for proper depth assessment.
Utilize both front and side angles, keeping in mind that front views may exaggerate depth perceptions. Set the camera height around 27 inches to mimic the perspective of a personal trainer.
After filming, review the clips, concentrating on your back angle, knee position, and the relationship between your hip crease and knee. Document each clip based on your depth targets to aid in evaluating progress and making necessary technique adjustments, ensuring you stay healthy and maximize your home gym experience.
Angle Comparison Analysis
Effective evaluation of squat depth is essential for anyone utilizing home gym equipment to achieve their fitness goals. To accurately assess your squat form, compare video clips captured from both front and side angles. This method allows you to evaluate the visibility of the hip crease relative to the knee, ensuring you maintain proper technique.
Position your camera parallel to the knee for a referee-like perspective, giving you a clear view of your form. Using multiple video clips from different angles enhances your analysis, revealing variations in depth perception that can inform your workout adjustments.
- Front angles may obscure depth clarity, making it harder to assess your form.
- Side angles provide a more accurate view of your squat depth.
- Gathering viewer feedback can help you refine your camera placements for optimal recording.
Tips for Effective Self-Assessment
To accurately assess your squat depth at home, it is essential to implement a structured self-assessment routine that prioritizes camera positioning and angle. Position your camera parallel to your knee at a height of 27 inches, 105 inches away, and film from a rear oblique angle. This setup helps you clearly evaluate your squat mechanics, ensuring you maintain proper form while exercising in your home gym.
| Camera Setup | Importance |
|---|---|
| Height: 27 inches | Simulates a coach’s viewpoint |
| Distance: 105 inches | Prevents distortion |
| Angle: Rear oblique | Highlights hip crease depth |
Use this routine consistently during your last set at working weight for effective feedback on your technique, helping you stay healthy and achieve your fitness goals at home.
Engaging With Experts for Guidance
While self-assessment is crucial for perfecting your squat technique at home, seeking expert guidance can significantly deepen your understanding of how to evaluate your squat depth.
Engaging with knowledgeable professionals can provide you with valuable insights on effective filming angles and depth assessment. Here are some suggestions:
- Connect with fitness experts on social media to ask specific questions. For example, you might reach out to Mike Newbern on Instagram, known as the “kilted lifter.”
- Attend online workshops or webinars that offer hands-on experience with setting up cameras to analyze your technique.
- Join online fitness communities or forums where you can share your experiences, seek advice, and receive feedback from experts and fellow home gym enthusiasts.


