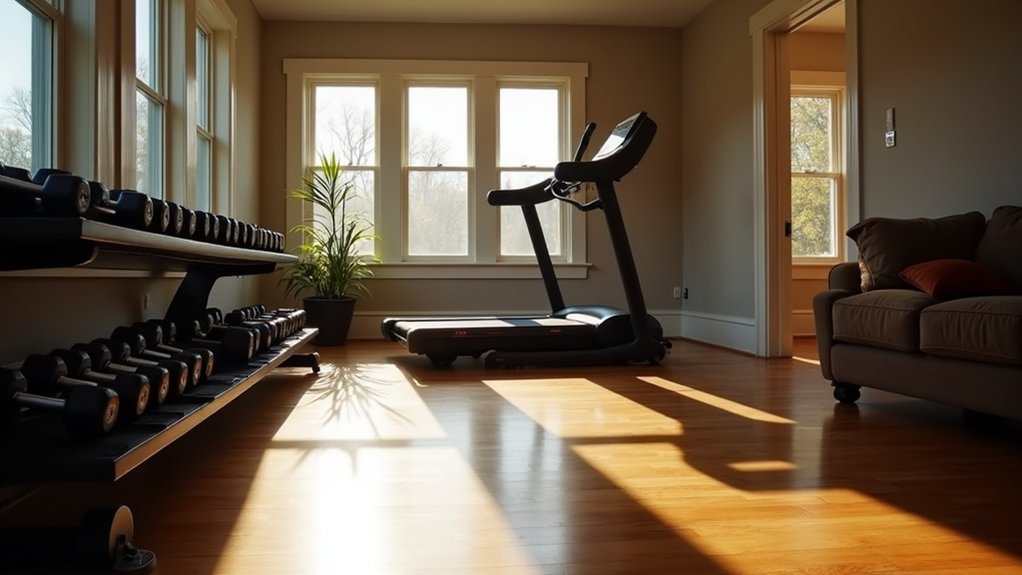
To successfully move your home gym to a new house, it’s essential to plan ahead and take inventory of your equipment. Assess your new space to determine the best layout for an efficient workout setup. Carefully disassemble heavier pieces, labeling each part as you pack to ensure a smooth reassembly process. When lifting, remember to use proper techniques and don’t hesitate to ask for help with bulky items to prevent injury. Protect your floors and walls during the move to avoid any damage. Secure your equipment during transit to prevent any mishaps. Once you’ve settled in and unpacked, meticulously reassemble your gym equipment and test everything to ensure it functions optimally. Stay tuned for more tips to make your transition seamless and keep your fitness journey on track!
Key Takeaways
- Begin by taking inventory of all your gym equipment, paying close attention to size and weight, to formulate an efficient moving plan that suits your needs.
- Carefully disassemble each piece of equipment according to the manufacturer’s instructions. Use labeled bags for all parts to maintain organization during the move.
- Enlist the help of friends or family for heavy lifting, ensuring that all equipment is securely transported with straps and tie-downs to prevent any damage.
- Once you arrive at your new home, set up your gym by following the original assembly instructions and conducting thorough safety checks on each piece of equipment.
- After relocating, test each item to confirm functionality and promptly address any maintenance needs to keep your home gym in peak condition for your fitness journey.
Plan Ahead
When you’re gearing up to move your home gym, planning ahead is essential to ensure a smooth transition.
Begin by taking a comprehensive inventory of your workout equipment, noting the size, weight, and any special handling requirements for each item. Create a detailed moving plan that outlines timelines and tasks, so you’re clear on which pieces of equipment will be coming with you.
Evaluate the layout of your new space to identify the best placement for each item, maximizing your workout efficiency. Don’t forget to consider potential helpers—whether friends or professional movers—to assist with transporting heavier pieces.
Organize your packing materials and transportation methods in advance to streamline the entire relocation process, allowing you to get back to your fitness routine as soon as possible.
Map It Out
After you’ve created a solid plan for your move, it’s time to map it out for maximum efficiency in setting up your home gym. Start by measuring the new space to determine where each piece of your fitness equipment will fit best. This ensures that you have optimal accessibility during your workouts.
Next, draft a timeline for disassembling and packing heavy items like weight benches and cardio machines, and gather all necessary packing materials. Decide on the best transportation method, whether you’re renting a truck or hiring professional movers who understand the value of your gym gear.
Finally, chart a clear moving path, noting obstacles like narrow doorways or stairs that could complicate the process of relocating your workout essentials. Your organized approach will make all the difference in creating a seamless transition to your new fitness space!
Disassemble and Pack Strategically
Disassembling and packing your home gym equipment requires a strategic approach to ensure everything arrives at your new space intact and ready for setup.
Follow these steps to make your move smooth and efficient:
- Utilize labeled zip-lock bags for all parts and fasteners to keep them organized.
- Wrap individual components in moving blankets or bubble wrap for added protection during transit.
- Fill any empty spaces in boxes with crumpled packing paper to prevent movement and damage.
Always adhere to the manufacturer’s instructions for disassembly.
Taking photos of complex setups can greatly assist you during reassembly.
Lift Smart, Not Hard
When it comes to relocating your home gym, employing proper lifting techniques is essential for preventing injuries.
Always engage your legs for lifting and don’t hesitate to ask for assistance with larger items; teamwork not only enhances safety but also streamlines the process.
Remember to utilize moving tools like dollies or straps to make heavy lifting easier and to maneuver through tight spaces with confidence.
Keep your focus on safety and efficiency, and you’ll ensure a smooth transition for your workout sanctuary!
Proper Lifting Techniques
While moving your home gym may seem daunting, mastering proper lifting techniques is essential for ensuring the process is both safe and efficient. Here are some vital tips to keep in mind on moving day:
- Always bend at your knees and maintain a straight back when lifting heavy items to protect your spine.
- Adopt a wide stance for better stability and balance, aiding in weight control and reducing the risk of injury.
- Don’t hesitate to enlist the help of friends or family when dealing with bulky equipment; sharing the load can significantly decrease strain on your body.
Additionally, consider using lifting straps to help distribute weight evenly and enhance your grip.
Planning your lifting route ahead of time will help you avoid obstacles and create a smoother transition.
Use Moving Equipment
Using the right moving equipment can significantly ease your home gym relocation, ensuring a smooth transition for your fitness space.
Invest in high-quality tools such as dollies, furniture sliders, and hand trucks to transport your heavy workout machines effortlessly. Lifting straps or moving harnesses are also essential for distributing weight evenly, making it easier to maneuver your bulky equipment.
Remember to lift with your legs and maintain a straight back to prevent injury. Before you start, plan your route and clear any obstacles to ensure safe navigation.
If you’re feeling overwhelmed by the process, don’t hesitate to reach out to professional moving companies; they can provide the expertise and specialized equipment necessary for a seamless relocation of your home gym, allowing you to focus on staying fit and healthy.
Protect Your Floors and Walls
Moving a home gym can be a challenging task, but protecting your floors and walls is essential to avoid costly damage while ensuring your space remains conducive to exercising at home.
Protecting your floors and walls during a home gym move is crucial to prevent damage and maintain an inviting workout space.
Here are some tips to keep everything safe during your move:
- Utilize furniture sliders to effortlessly maneuver heavy gym equipment without scratching your floors or damaging walls.
- Lay down protective coverings like cardboard or moving blankets in high-traffic areas to safeguard surfaces during the transition.
- Pad corners with towels or bubble wrap to prevent impacts that could lead to unsightly dents or scratches.
Additionally, be sure to clear obstacles such as rugs or furniture and consider using furniture dollies for heavy items.
Secure Equipment in Transit
When you’re ready to hit the road with your home gym equipment, securing your gear is essential for a smooth and safe journey.
Use straps and tie-downs to keep everything in place, ensuring that your weights, mats, and machines are stable.
Remember not to overload your vehicle; maintaining balance is key to a safer trip.
A well-secured load means you can focus on your fitness goals without worry, so double-check that everything’s fastened before you start driving!
Keep your commitment to health and fitness strong, even on the go.
Properly Fasten Equipment
To ensure your home gym equipment arrives safely at its new location, it’s essential to secure everything properly during transit. Here are key steps to effectively fasten your gym gear:
- Utilize heavy-duty straps or bungee cords to keep your gym equipment secure.
- Balance and evenly distribute items within the moving truck for stability.
- Avoid placing heavy items on top of lighter ones to prevent damage.
Before embarking on your journey, double-check that everything is stable and securely fastened.
Make it a habit to regularly inspect the load during transit to ensure nothing has shifted.
Avoid Overloading Vehicle
Ensuring your gym equipment is securely fastened is just the start; it’s crucial to keep your vehicle within its weight limits too.
When relocating your home gym, distribute the weight evenly to prevent overloading your vehicle. Place heavier items at the bottom for stability, and use straps or bungee cords to secure everything in place.
Avoid stacking lighter items on top of heavier equipment to prevent damage. Regularly check your load during transport to ensure nothing shifts.
Adhering to your vehicle’s weight capacity guidelines not only protects your valuable fitness gear but also ensures a safe and smooth journey to your new home.
Unpack and Reassemble With Care
Unpacking and reassembling your home gym equipment is essential for creating a safe and effective workout environment.
Follow these detailed steps to ensure everything is set up correctly for both men and women looking to stay healthy and fit from the comfort of home:
- Carefully unpack each piece, using labeled boxes and photographs to guide you through the process.
- Consult the original assembly instructions to accurately reassemble all components.
- Ensure safety by checking cable routing and securely tightening all bolts.
Once your equipment is fully reassembled, organize your workout space for maximum accessibility and functionality.
Position heavier items on stable surfaces and maintain ample space for movement.
With attention to detail and focus, you’ll have your home gym ready for a productive workout in no time!
Test and Inspect
After you’ve reassembled your home gym, it’s essential to test and inspect each piece of equipment to ensure everything is in optimal condition. Look for any signs of damage, such as dents or loose parts, and test the functionality to confirm smooth operation and proper response from electronic components.
| Equipment | Inspection Checklist |
|---|---|
| Treadmill | Check display and controls |
| Weight Bench | Inspect weight locks |
| Stationary Bike | Test emergency stops |
| Resistance Bands | Look for wear and tear |
Address any issues immediately to guarantee your safety during workouts. Regular checks will help maintain equipment performance and enhance your home exercise experience! Stay committed to your fitness journey with a well-functioning gym setup.


