To replace a treadmill belt at home, start by inspecting it for signs of wear, such as fraying or slipping, which can hinder your workout experience. Gather the necessary tools: a Phillips screwdriver, Allen wrench, box wrench, and pliers. For safety, unplug the treadmill before you begin. Remove the motor hood and loosen the rear roller bolts to take off the old belt. When installing the new belt, make sure it is properly aligned for optimal performance. Once you’ve secured the new belt, reattach the motor hood. If you encounter any difficulties or are looking for additional maintenance tips to enhance your home gym setup, feel free to explore more insights tailored for your fitness journey.
Key Takeaways
- Begin by unplugging the treadmill and removing the motor hood to safely access the internal components for belt replacement.
- Utilize a Phillips screwdriver and Allen wrench to loosen the rear roller bolts, allowing you to remove the old treadmill belt.
- Carefully install the new belt, ensuring it is properly aligned and tensioned before reattaching all components securely.
- To enhance the durability of your treadmill belt, regularly inspect it for signs of wear and lubricate it according to the manufacturer’s recommendations.
- If you feel uncertain about the replacement process, consider seeking professional assistance; this can help maintain your warranty and prevent any potential damage to your equipment.
Identifying Signs of Treadmill Belt Wear
When you notice visible signs of wear on your treadmill belt, it’s crucial to address them promptly to ensure your home workouts remain safe and effective.
Keep an eye out for fraying edges, cracks, or holes—these are clear indicators that it’s time for a treadmill belt replacement.
Look for fraying edges, cracks, or holes—these signs mean it’s time to replace your treadmill belt.
Slippage during your workouts is another important sign of wear; if the belt loses grip, don’t hesitate to take action.
A smooth or excessively worn surface may indicate material degradation, while unusual noises like scraping or grinding can signal friction issues.
Regular inspections for these signs of wear will help you maintain your treadmill and extend the belt’s lifespan, allowing you to stay committed to your fitness journey from the comfort of your home.
Tools Required for Treadmill Belt Replacement
When you notice signs of wear on your treadmill belt, addressing the issue promptly is essential for maintaining your home gym and ensuring effective workouts.
To successfully replace the treadmill belt, you’ll need a few key tools. A Phillips screwdriver is essential for removing screws, while an Allen wrench will help you adjust the belt tension effectively. A box wrench is useful for loosening bolts, making the replacement process smoother. Pliers can come in handy for gripping components securely.
Make sure to have a cleaning cloth at your side to tidy up your workspace and keep surfaces clean. Additionally, it’s important to consult your treadmill’s user manual to confirm the specific size and type of replacement belt, as requirements may differ by model.
Keeping your treadmill in top shape ensures you can continue to exercise effectively in the comfort of your home.
Step-by-Step Guide to Replacing the Treadmill Belt
To replace your treadmill belt effectively, it’s essential to have the right tools and follow a clear step-by-step approach.
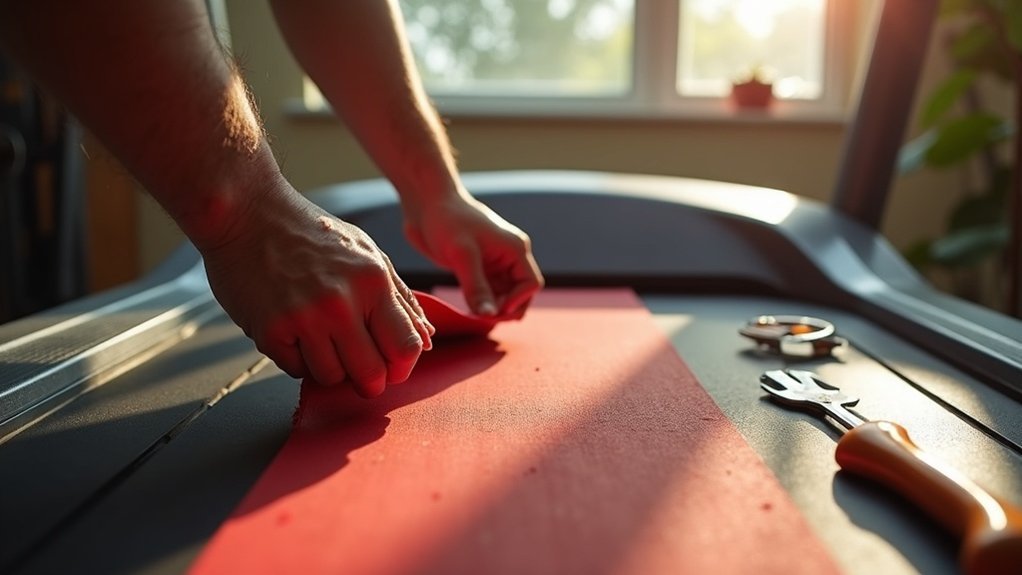
Begin by unplugging the machine for safety, then remove the motor hood. Next, carefully loosen the rear roller bolts and take out the old belt.
Once the old belt is removed, install the new belt and ensure it’s properly aligned. After the installation, perform a quick check to troubleshoot any common issues, ensuring everything is in order before testing the treadmill’s performance.
Regular maintenance like this helps keep your home gym equipment in top shape, supporting your health and fitness goals.
Tools Needed for Replacement
Replacing a treadmill belt is an essential maintenance task for any home gym enthusiast, and having the right tools on hand can make the process smooth and efficient.
To get started, you’ll need a Phillips screwdriver to remove screws and an Allen wrench for adjusting the belt tension. Pliers can be useful for gripping components during the replacement process. Depending on your treadmill model, an electric drill may be necessary for accessing the motor hood or deck.
Don’t forget to have a high-quality silicone-based lubricant to minimize friction on the new belt, ensuring a smooth workout experience.
It’s also helpful to have a flashlight and cleaning cloth ready for inspecting and cleaning the deck area before installing the new belt.
Lastly, make sure you have the correct specifications for the replacement belt to maintain optimal performance in your home gym.
Taking the time to properly replace the treadmill belt will help keep your fitness routine on track and your equipment in top shape.
Step-by-Step Instructions
Before you start replacing the treadmill belt, make sure the machine is unplugged to ensure your safety and avoid any electrical hazards. Follow these steps for a successful replacement:
| Step | Action | Tool Required |
|---|---|---|
| 1 | Remove motor hood | Phillips screwdriver |
| 2 | Loosen tension bolts | Allen wrench |
| 3 | Remove old walking belt | None |
| 4 | Slide on new belt | None |
| 5 | Reattach motor hood and plug in | Phillips screwdriver |
After replacing the belt, remember to maintain it by regularly checking and lubricating according to the manufacturer’s guidelines. Keeping your treadmill in top shape is essential for achieving your fitness goals at home!
Troubleshooting Common Issues
Even after following the step-by-step instructions for replacing your treadmill belt, you might encounter some common issues that require troubleshooting.
Look for signs that indicate misalignment or incorrect tension. If the belt slips or doesn’t run smoothly, you’ll need to adjust the rear roller bolts. Use an Allen wrench to tighten or loosen them until the belt runs evenly.
Make sure to check the belt regularly for wear and lubrication, as these factors can prevent slippage and extend the belt’s lifespan.
Addressing these issues promptly will help ensure your treadmill operates efficiently, allowing you to maintain your fitness routine and enjoy your home workouts for years to come.
Safety Precautions During Replacement
When replacing a treadmill belt, safety should be your top priority to avoid accidents and injuries. Start by unplugging the treadmill to prevent any accidental activation. Remove the safety key and store it securely to ensure it can’t be engaged during the replacement process.
Always wear protective gear, including gloves and safety goggles, to protect yourself from sharp edges and debris. Keep your workspace clean and organized to minimize the risk of accidents and ensure tools are easily accessible.
Lastly, adhere closely to the manufacturer’s instructions for safe handling and proper assembly of parts during the replacement. Remember, your safety is essential while maintaining your home gym equipment for a healthier lifestyle.
Maintenance Tips for Prolonging Belt Life
After ensuring your safety during the treadmill belt replacement, it’s crucial to implement maintenance strategies that can prolong the life of your new belt.
Regularly clean the treadmill belt to remove dust and debris, which can minimize friction and reduce wear and tear. Be sure to lubricate the belt following the manufacturer’s guidelines, typically every three to six months, to enhance its durability.
Periodically check for signs of wear, such as fraying edges or unusual noises, to catch potential issues early. Maintain your treadmill in a stable environment, steering clear of extreme temperatures and humidity that could affect performance.
Lastly, ensure proper alignment and tension of the belt to prevent uneven wear, thereby extending the lifespan of your treadmill and supporting your home workout routine.
When to Seek Professional Assistance
Treadmill maintenance can sometimes present challenges that are best handled by professionals. If you encounter persistent belt slippage or misalignment after attempting a repair, it’s a good idea to call in an expert to prevent further damage to your equipment.
Additionally, if you don’t have the necessary tools like an Allen wrench or Phillips screwdriver, a technician can ensure that the installation is done correctly. If you see significant visible damage to the treadmill deck or motor components, professional assistance is crucial for a comprehensive assessment and repair.
Lacking the right tools or noticing damage? Professional help ensures proper installation and thorough repairs for your treadmill.
Lastly, if you’re not comfortable disassembling your equipment, or if your treadmill is still under warranty, hiring a professional can help you safely and effectively replace parts without risking your warranty coverage.
Prioritizing proper maintenance will keep your home gym equipment in top shape, allowing you to focus on your fitness journey.


